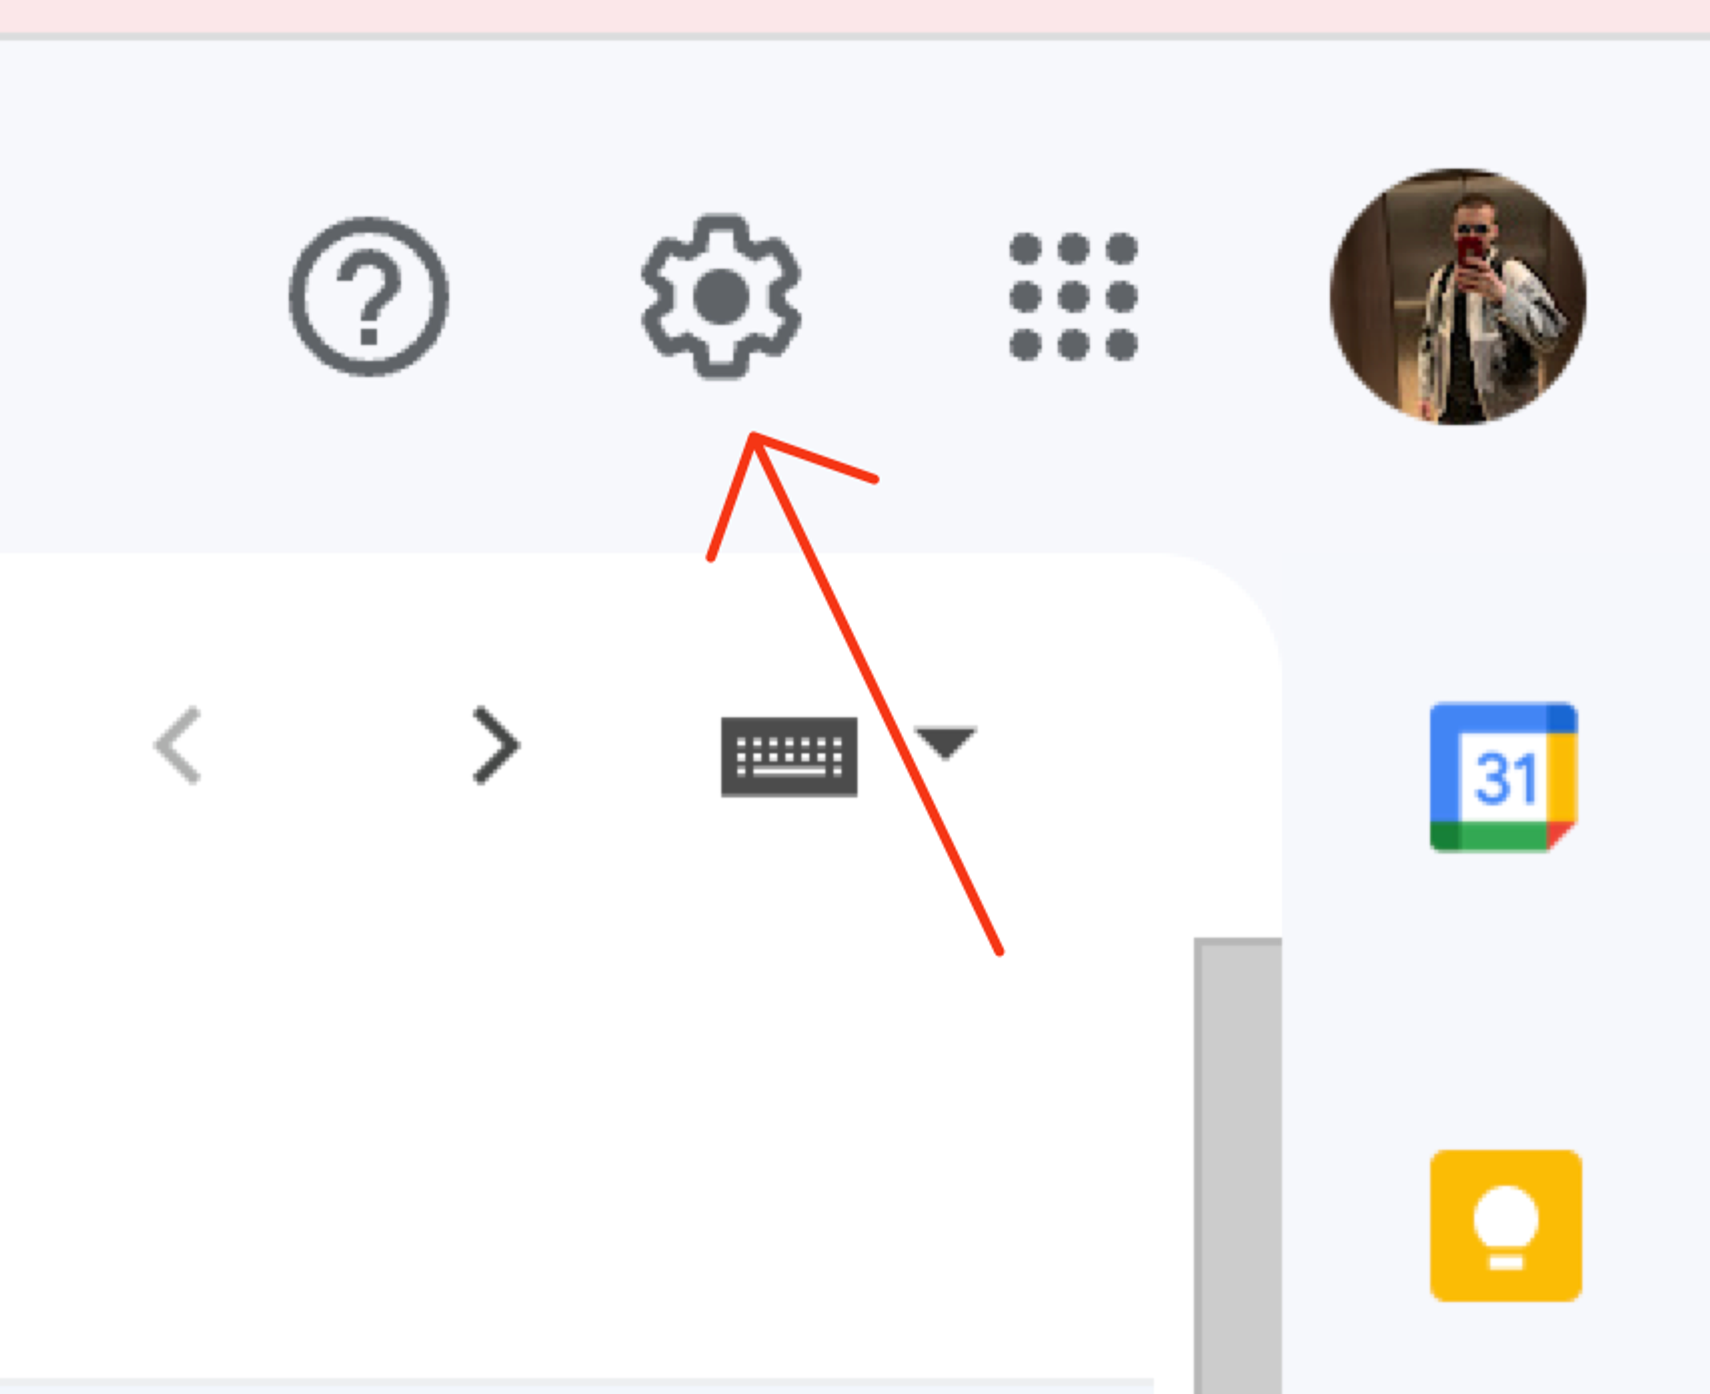
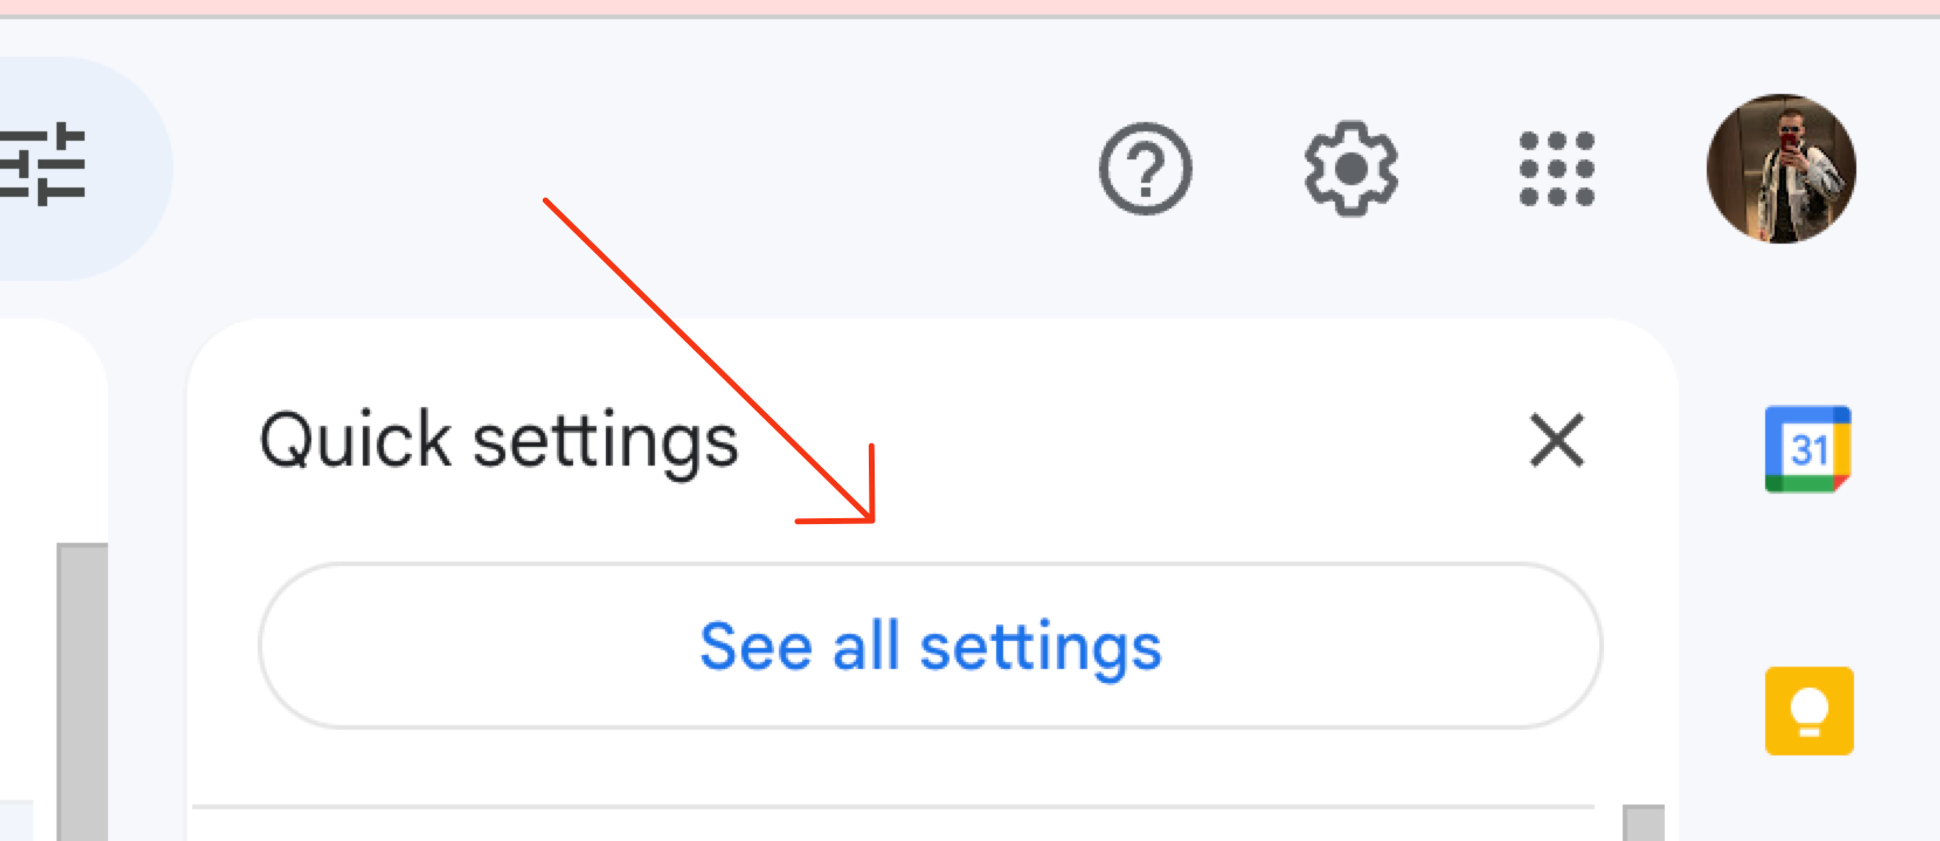
Navigate to Forwarding and POP/IMAP
Click on the “Forwarding and POP/IMAP” tab in the settings menu.

Enter your Summate inbox address
Enter your unique Summate inbox: 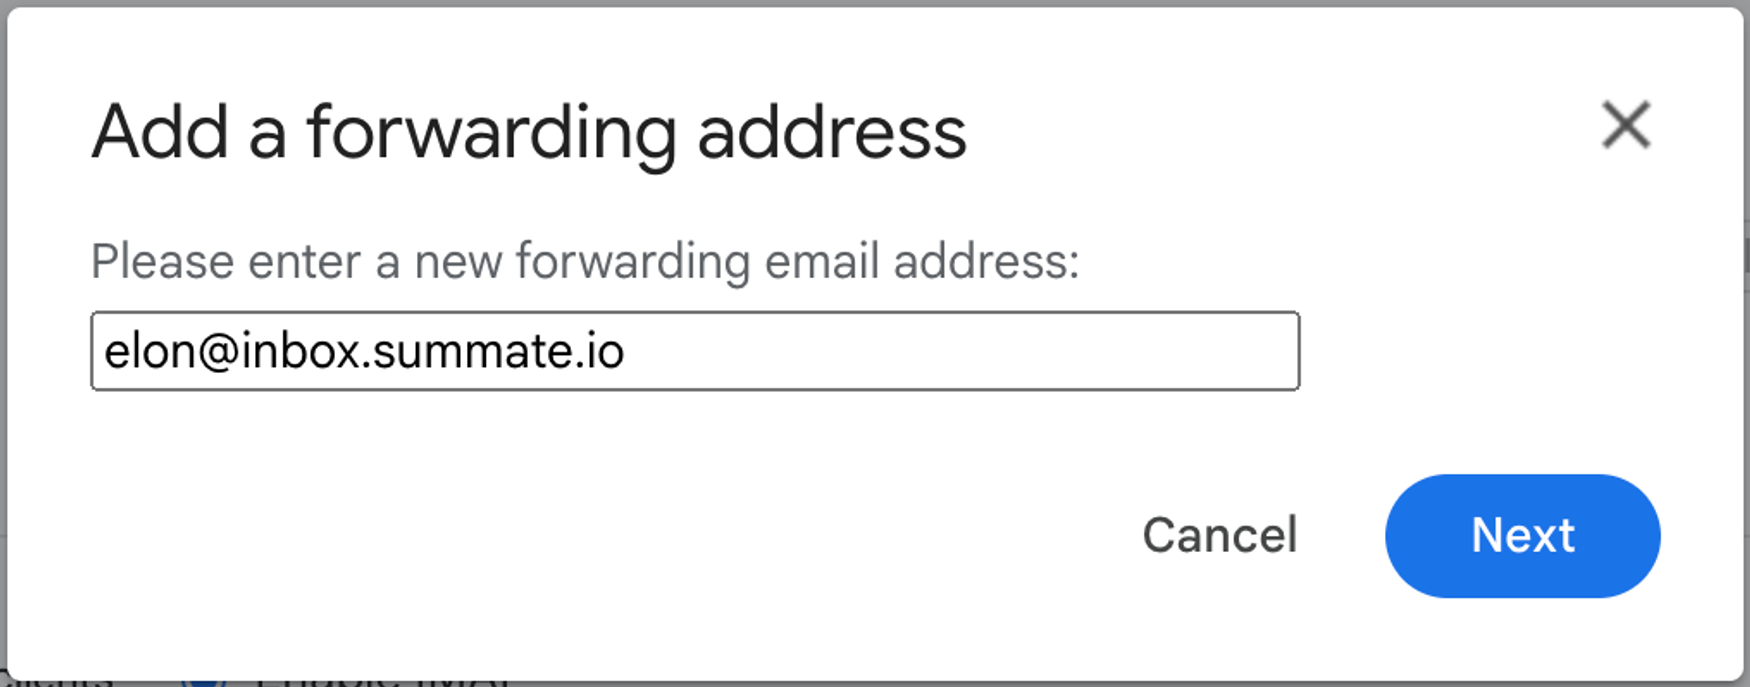
username@inbox.summate.ioYou should have received this during onboarding. If you haven’t, visit your inbox page to find it.Authorize your request
Gmail will ask you to verify your identity (possibly through 2FA).After authorization, Gmail sends a verification link to your Summate inbox.
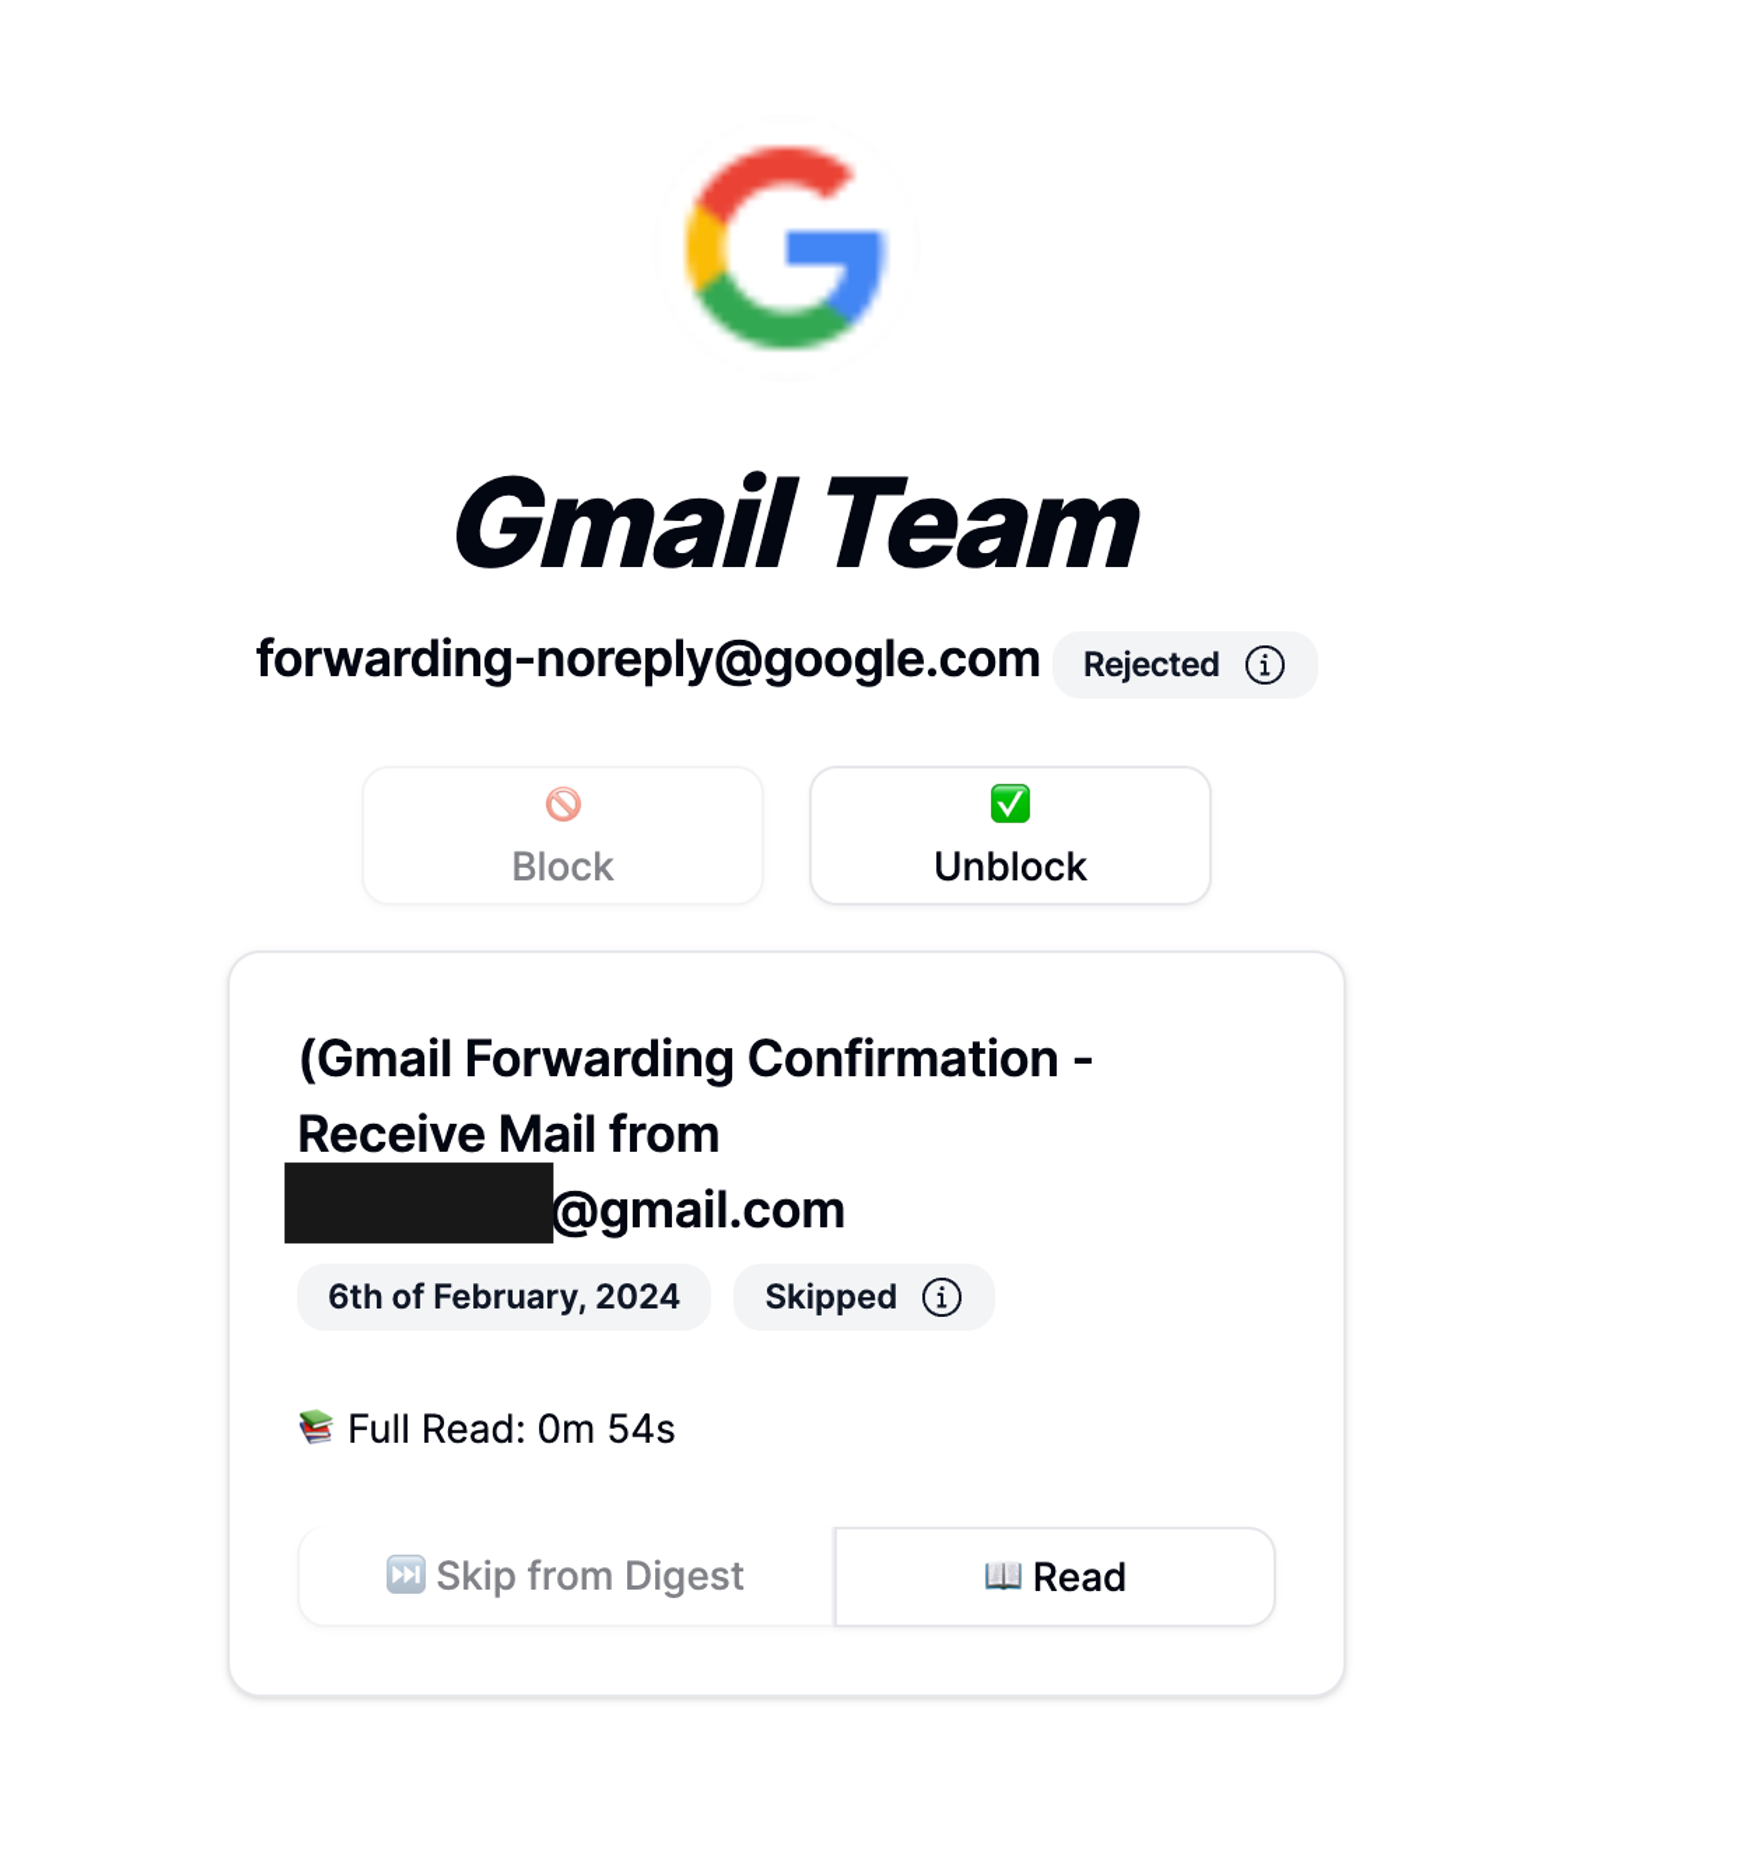
Find the verification email
- Navigate to your Summate inbox
- Look for a new sender in the pending section
- Click on the Gmail verification email
Complete verification
Copy the verification link from the email (it starts with 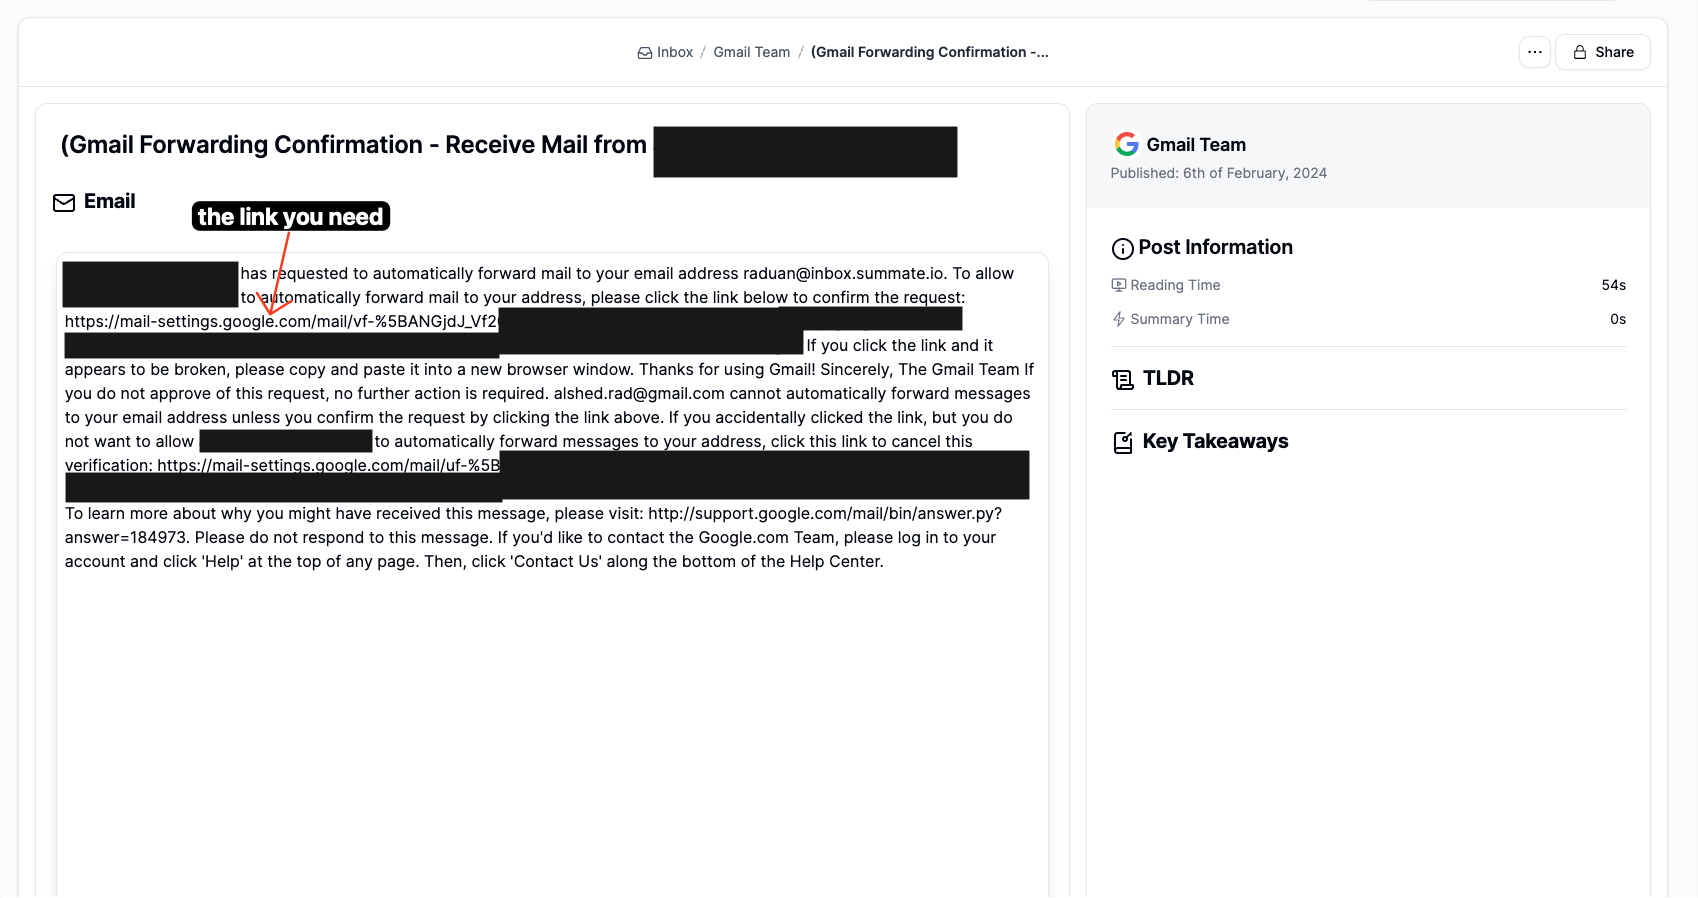
https://mail-settings.google.com/mail/...) and paste it into your browser.Set up forwarding filters
Now that your Summate address is verified, create filters to selectively forward newsletters.Part A: Go to Filters and Blocked Addresses
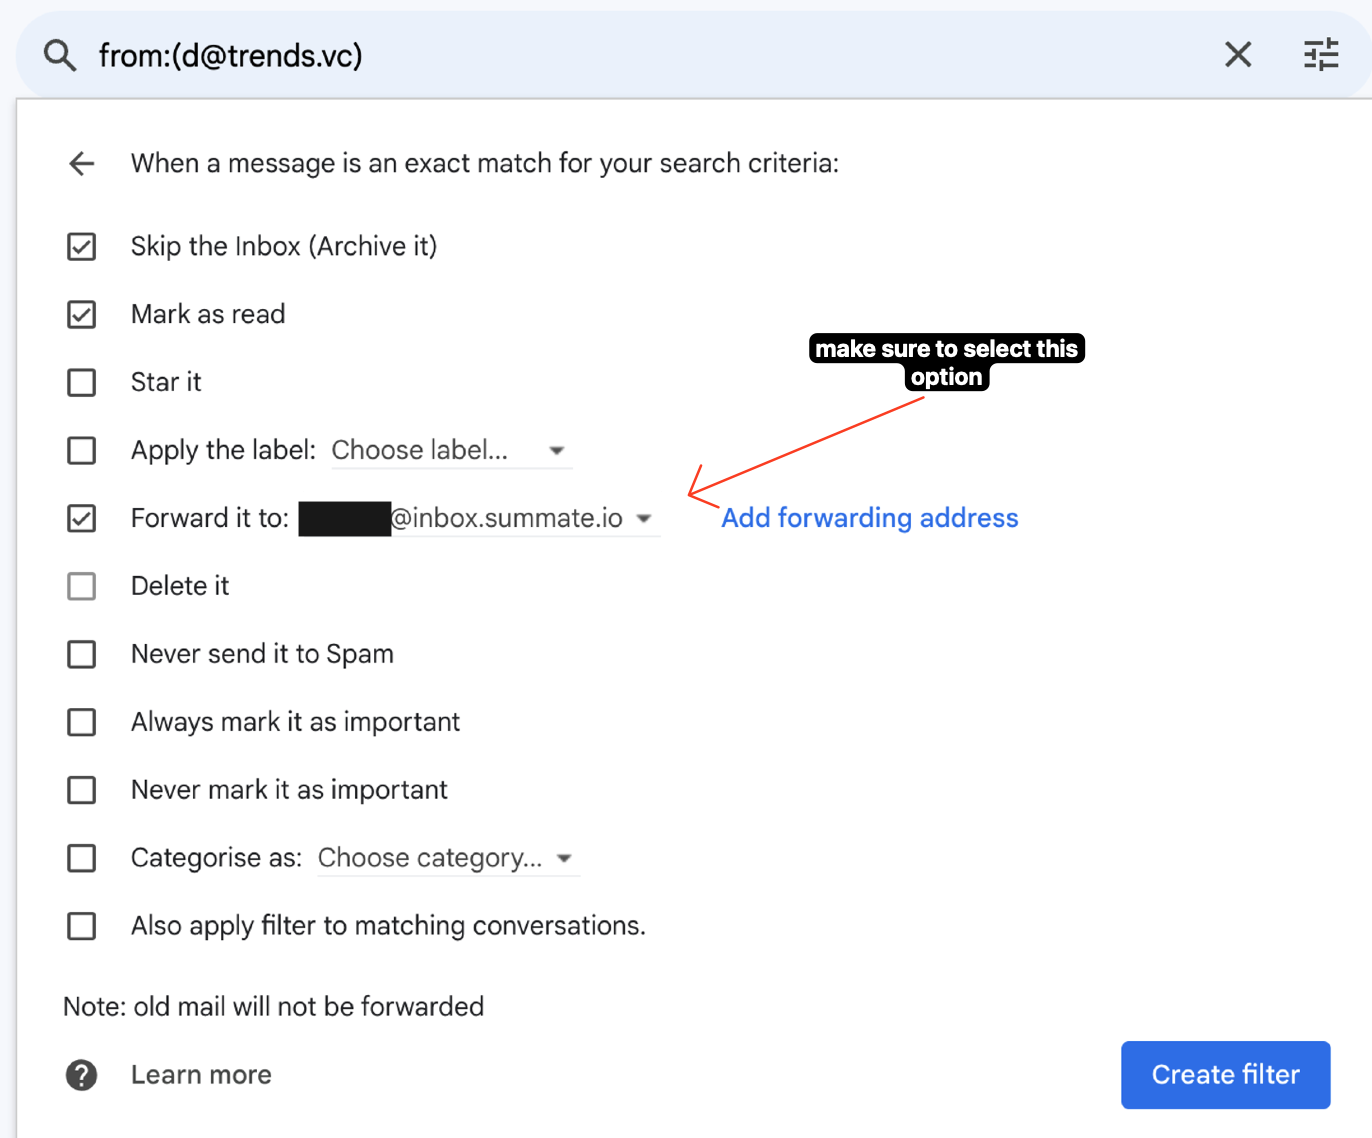
- Check “Forward it to” and select your Summate inbox
- Optionally check “Mark as read” to keep your inbox clean
- Click “Create filter”
Label-Based Forwarding
How to Forward by Label
- Go to Gmail Settings > Filters and Blocked Addresses
- Click “Create a new filter”
- In the “Has the words” field, enter
label:yourlabelname(replace with your actual label) - Click “Create filter” and check “Forward it to”
- Select your Summate inbox address
label:parent/child.
Example: If you organize newsletters under a label called “Newsletters”, create a filter with label:Newsletters and forward to your Summate inbox. Any email you label as “Newsletters” will automatically forward to Summate.
Next Steps
Filter Tips
Learn smart filtering strategies to forward only newsletters
Back to Overview
Return to the main auto-forwarding guide